尽管3D打印技术拥有许多优势,但使用它的主要关注点之一是成本。从设计到制造再到后处理,一些技巧可以显著影响成本。本文重点介绍在3D打印过程中对节省成本有用的小贴士。
在3D打印每个阶段降低成本的小贴士
本部分根据3D打印过程的不同阶段分为三个部分,并提供尽可能降低成本的小贴士。以下是详细内容。
通过设计降低成本
空心3D模型
空心化是减少材料使用和降低3D打印成本的一个好方法。空心化可以去除部件内部的材料,仅留下一个外壳。这也是制作轻量化部件的良好方式。如果您计划使用激光烧结成型(SLS)或惠普尼龙多流射熔融成型(MJF)等使用粉末材料的3D打印技术,那么您可以考虑进行空心设计。
让我们来对比一下实心部件和空心部件的成本。
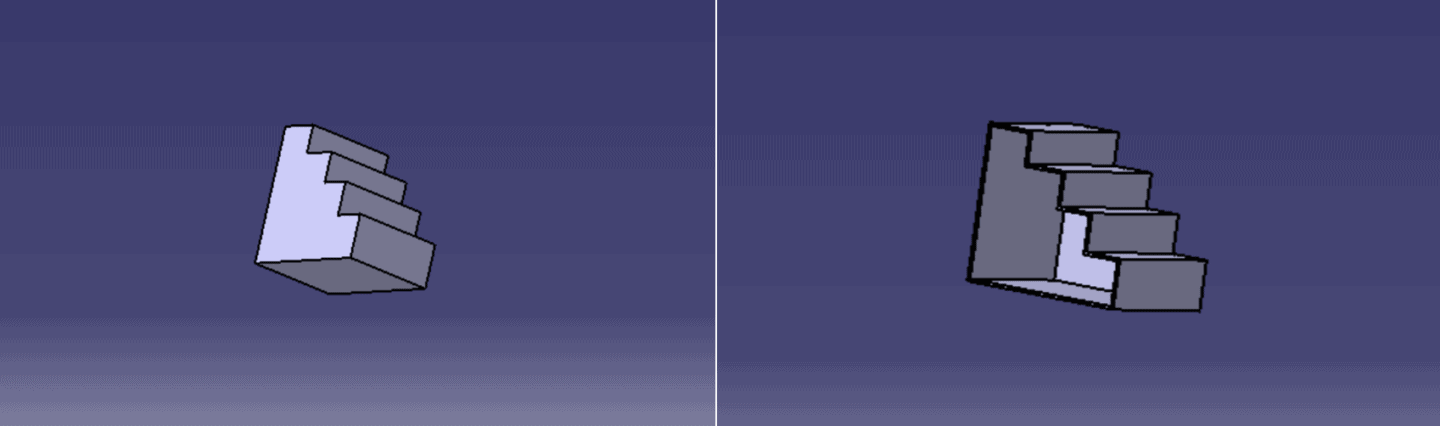
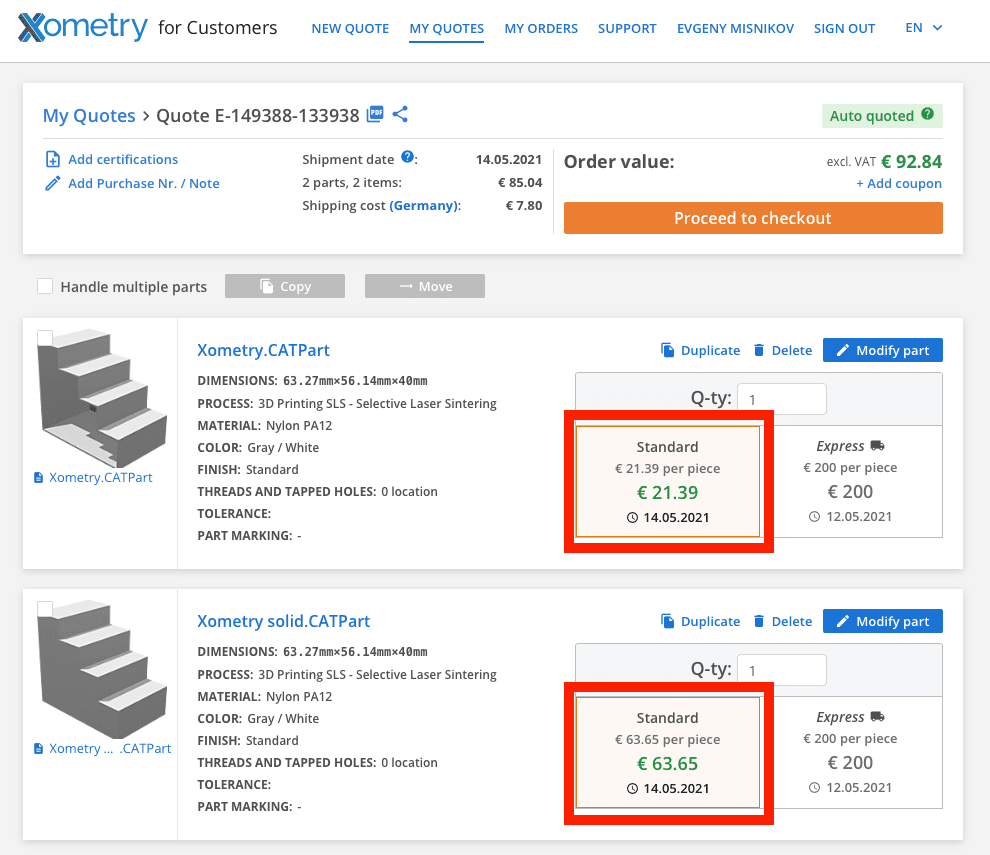
空心部件比实心部件便宜三倍。
请检查您的3D打印物体的尺寸
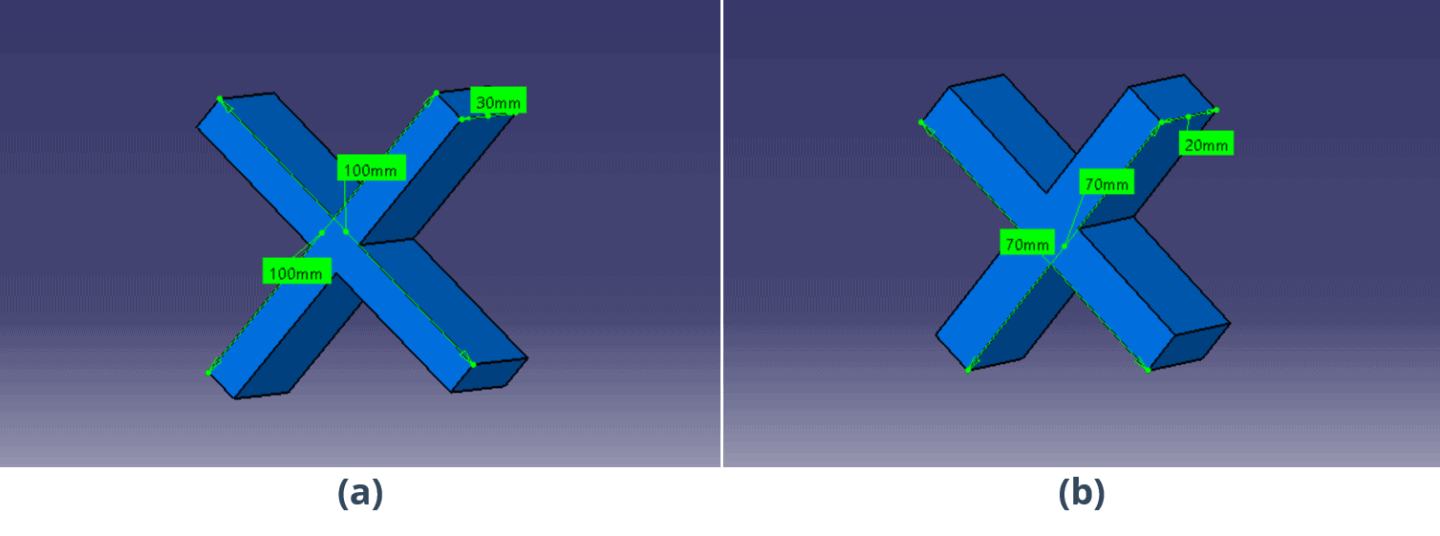
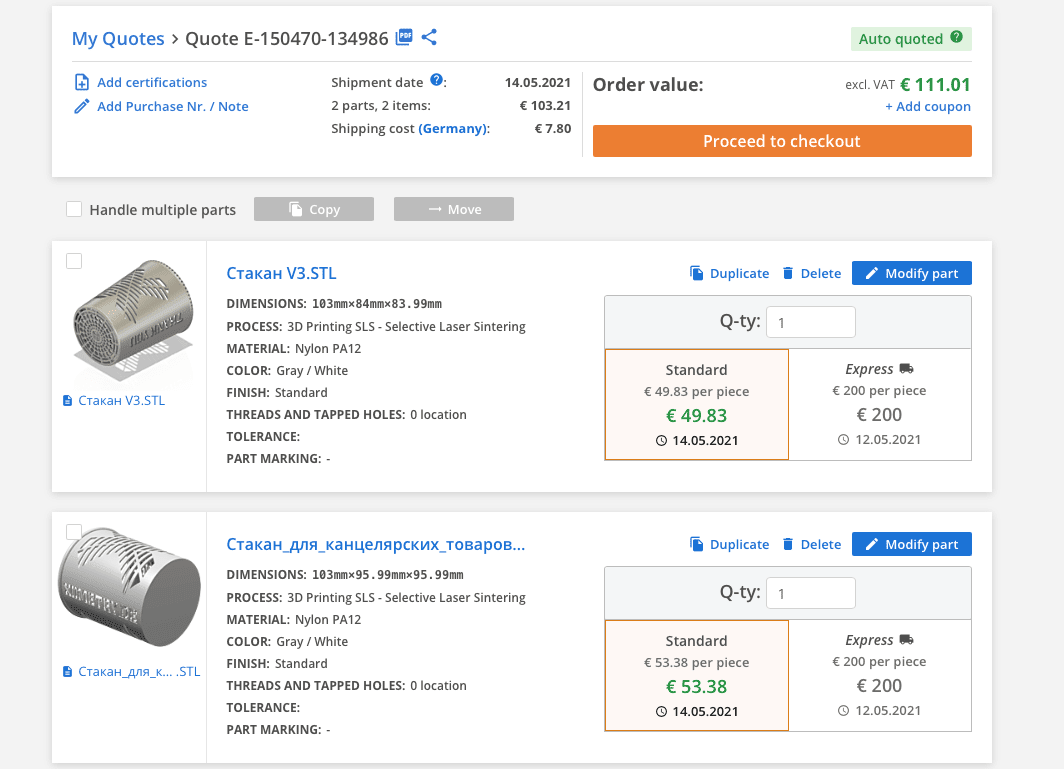
您的3D打印物体的尺寸将直接影响3D打印价格。如果您的原型的尺寸不重要(例如视觉原型),您可以缩小模型以大幅降低成本。事实上,3D打印的价格与物体在机器托盘上占据的体积成正比。为了降低成本,建议在CAD软件中重新考虑您的物体尺寸。
让我们来比较一下模型(a)和它的缩小版模型(b)的成本:
|
Technology |
Unit cost (€) |
Unit cost per 100 pieces (€) |
||
|
a |
b |
a |
b |
|
|
FDM |
18.54 |
10.57 |
5.69 |
3.00 |
|
MFJ |
26.75 |
24.30 |
16.36 |
7.68 |
成本对比可以清楚地看到缩小版模型更为便宜。
优化设计
精心设计的3D打印部件可以更大限度地利用材料,从而减少不必要的成本。
以下是一些小贴士:
- 使用渐进的过渡连接相邻的表面。
- 避免尖角,这往往会在成品工件中产生残余应力。
- 确保无支撑薄壁不要太高,否则它们可能会弯曲或变形。
- 浅角度的表面往往会出现难看的“阶梯状”,使其不适合作为外观特征,并需要后续处理来消除这些问题,增加成本。
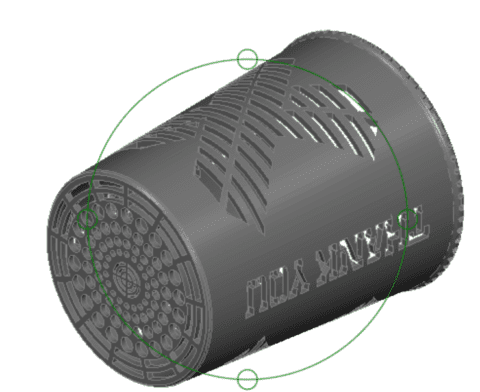
- 智能设计。例如,下面这个既经济又不失功能的笔筒设计案例。
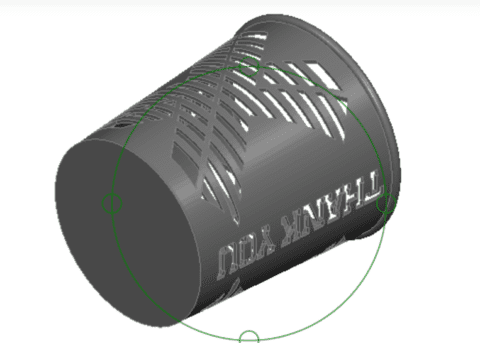
我们仅通过在底部打孔,就将价格降低了7%
通过选择合适的制造选项来降低成本
选择合适的材料
降低材料成本的更佳方法是确保根据需求选择合适的材料。如果您打印的部件只是一个视觉模型,那么很可能不需要使用昂贵的连续液态界面生产树脂(CLIP)材料。高性能材料,如聚醚酰亚胺树脂(ULTEM)等材料的价格总是比聚酰胺(PA)或聚乳酸(PLA)等材料高。因此,合理选择材料有助于降低成本。
选择合适的工艺
与激光烧结成型(SLS)工艺相比,热塑性材料熔融沉积成型(FDM) 和惠普尼龙多流射熔融成型(MJF)技术要便宜得多,材料也非常容易获得且价格低廉。因此,建议先明确需求。如果您使用3D打印进行原型制作或视觉模型,热塑性材料熔融沉积成型(FDM)、激光烧结成型(SLS)或惠普尼龙多流射熔融成型(MJF)都能很好地满足需求。如果您对技术要求较高并且希望获得高端打印,可以选择数字光学合成打印、树脂光固化成型、刚性光聚合物技术或直接金属激光熔融等工艺。
检查生产量
在生产单件或小批量(<100)时,3D打印是更佳选择。对于大批量生产,考虑使用CNC加工甚至注塑成型更为合适。如果设计复杂且传统加工无法实现,那么3D打印是一种选择;但如果设计简单且批量较大,从成本的角度考虑尽量避免使用3D打印。
通过后处理阶段降低成本
消除支撑结构
像惠普尼龙多流射熔融成型(MJF)或激光烧结成型(SLS)这样的工艺在构建部件时不需要支撑结构,但在热塑性材料熔融沉积成型中需要。在后处理阶段,这些支撑结构需要被移除,导致材料浪费和额外开支。因此,为了避免在后处理阶段的额外费用,请检查您的部件是否可以使用像激光烧结成型(SLS)或惠普尼龙多流射熔融成型(MJF)这样的粉末基技术制造。
选择后处理工艺
后处理有时需要手动后处理,这会增加3D打印的价格。例如,染色通常比涂装更便宜,因为染色是一种更快的技术。然而,涂装的颜色持久性更好,质量也更高。热塑性材料熔融沉积成型(FDM)和惠普尼龙多流射熔融成型(MJF)提供了彩色3D打印,无需额外添加颜色,可以考虑在成本降低中使用。诸如蒸汽抛光以光滑表面纹理的工艺也会增加成本。您可以根据需求选择更适合的工艺。
结语
3D打印的成本可以在设计、制造和后处理的各个阶段进行压缩。通过遵循我们的建议,您可以确保您的3D打印成本保持在合理水平。欢迎将您的设计上传至实时报价引擎,以获取报价,并比较您的设计迭代和可能的制造选项。