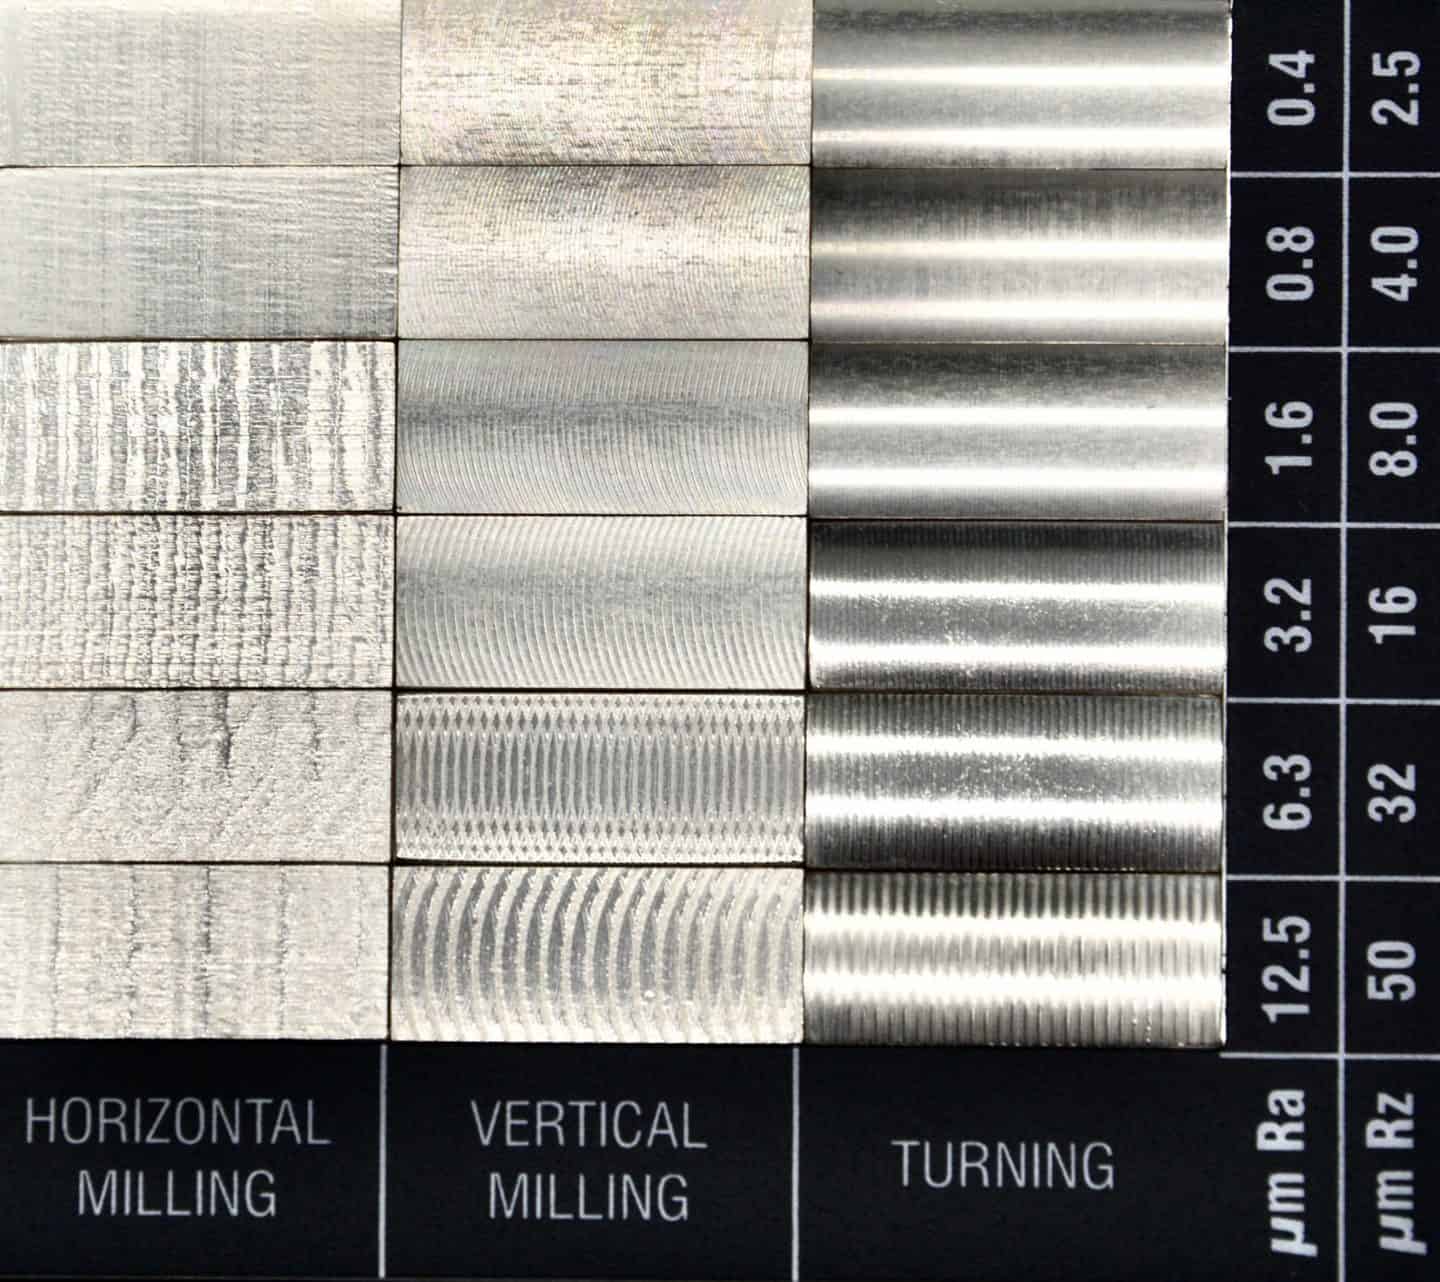
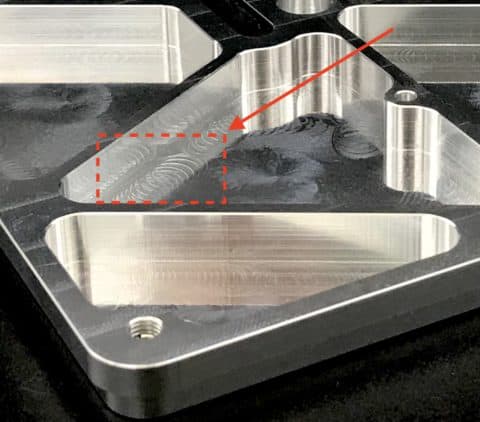
CNC machining is a highly accurate and precise manufacturing process that can create parts with tolerances as tight as 0.025 mm. However, being a subtractive manufacturing method, CNC machining leaves cut marks that create a level of roughness on the finished product's surface.
What is surface roughness?
Surface roughness is a measure of the average texture of a part's surface, in this case, after CNC machining. There are different parameters used to define surface roughness. One of the most ubiquitous of these is Ra (Roughness average), which is derived from the differences between heights and depths on a surface. Ra surface roughness is measured microscopically and is usually in micrometres (x 10~⁶ m). Note that surface roughness in this context is different from surface finish. The surface finish of a machined part can be improved via various finishing methods such as anodizing, bead blasting, and electroplating. Surface roughness here refers to the as-machined surface texture of a part.
How are different surface roughness options achieved?
A part's surface roughness after machining is usually not random. Instead, steps are taken to ensure that a specific roughness is achieved. This means that surface roughness values are planned in advance. However, not just any value is usually specified. In manufacturing, there are specific Ra values that are considered industry standards, as specified in ISO 4287. These are the values that may be specified during CNC machining. They range from 25 um to 0.025 um and apply to all kinds of manufacturing and post-processing operations.
At Xometry, we offer four surface roughness levels that are also the values typically specified for CNC Machining applications:
- 3.2 μm Ra
- 1.6 μm Ra
- 0.8 μm Ra
- 0.4 μm Ra
Different roughness values are required for different applications. Lower surface roughnesses should only be specified when necessary. This is because the lower the Ra value, the more machining effort/operations and quality control will be required. They can significantly drive up machining costs and time. Post-processing operations aren't usually applied when specific surface roughness values are required. This is because these operations cannot be controlled precisely and may affect the dimensional tolerance of parts.

Surface roughness significantly affects the functionality, performance, and durability of parts in certain applications. It influences the friction coefficient, noise level, wear and tear, heat, and adhesiveness of a part in use. The importance of these factors vary by application, and so while the surface roughness of a part is inconsequential in certain applications, it is critical in many others. These applications include high tension, stress, and vibration scenarios, mating and moving assemblies, fast rotating parts, and medical implants. As earlier stated, different levels of surface roughness are required in different applications.
The following explores the roughness levels that we offer at Xometry Europe and all you need to know in order to select the right Ra value for your application.
3.2 μm Ra
This is the standard commercial machine finish. It is suitable for most consumer parts and sufficiently smooth, but it contains visible cut marks. It is the default surface roughness applied unless otherwise is specified.

3.2 μm Ra is the recommended maximum surface roughness for parts subject to stress, loads, and vibrations. It can also be used for mating moving surfaces when the load is light and motion slow. It is machined using high speeds, fine feeds, and light cuts.
1.6 μm Ra
Usually, there are only slightly visible cut marks with this option. This Ra rating is recommended for tight fits and stressed parts, and is sufficient for slow-moving and light load-bearing surfaces. However, it is not suitable for fast rotating parts and parts subject to intense vibration. This surface roughness is produced using high speeds, fine feeds, and light cuts under controlled conditions.
Price: for a standard aluminium alloy (e.g. 3.1645) this option adds approximately 2,5% to the production price. This could increase with the complexity of the part.
0.8 μm Ra
Considered high grade, this surface finish requires very close control to produce, costing more. It is required for parts that are exposed to stress concentration. When the motion is occasional and the loads are light, then it can be used for bearings.
Price: for a standard aluminium alloy (e.g. 3.1645) this option adds approximately 5% to the production price. This could increase with the complexity of the part.
0.4 μm Ra
This is the finest ("least rough" in technical terms) and highest quality surface roughness that are offered. It is suitable for parts that are under high tension or stress. It is also required for rapidly rotating components such as bearings and shafts. This surface roughness takes the most effort to manufacture and should only be specified when smoothness is of primary importance.
Price: for a standard aluminium alloy (e.g. 3.1645) this option adds approximately 11-15% to the production price. This could increase with the complexity of the part.
At Xometry, we have the capability to manufacture your CNC machined parts with any of these surface roughnesses options. Simply upload your model on our instant quoting engine and select your preferred surface roughness to get a quote in a second.